5 Top Apps/Software For Video Masking: Create Mask Video Like A Pro
For a long time, video editors relied on pricey programs and powerful machines to get their work done.


For a long time, video editors relied on pricey programs and powerful machines to get their work done. In 2026, anyone can shape creative stories by using simple masking tools that hide and reveal parts. These tools let you highlight a subject, blur private details, and build smooth transitions between different scenes.
With a mask video effect, your clips can look professional without much effort. In this article, we will discover easy tools that make masking feel comfortable for beginners. By the end, you will know which video mask tool fits your needs and editing style.
Part 1. What To Look For In The Best Apps/Software For Masking In Video
Choosing reliable tools for masking in video helps you edit smarter and get clean, creative results. Now, we will explain the main features that matter before you pick any masking software:
⦁ Mask Types and Shapes: The software should support multiple shapes and complex patterns for flexibility.
⦁ Keyframing and Animation: You need to animate masks by moving and rotating them across different frames and scenes.
⦁ Motion Tracking: The tool should automatically track masks to follow moving subjects, saving time and preserving accuracy.
⦁ Feathering and Edge Control: Soft edges, adjustable feathering, and smooth blends help masks look natural in every shot.
⦁ Opacity and Blending Modes: You can control transparency and blending styles to mix masked areas with the background creatively.
⦁ Multiple Mask Layers: Allows editors to stack multiple masks on one clip for advanced, stylized effects.
Part 2. 5 Foremost Apps/Software For Masking In Video - All Solutions Compared
If we start looking for video mask tools in 2026, we will find countless choices. Having explored the necessary features, let's move forward and review several popular options in detail.
⦁ Wondershare Filmora (iOS|Android|Desktop)
An AI-backed solution, Wondershare Filmora gives editors strong control over complex masking tasks in everyday projects. It combines AI masking with precise manual tools to refine edges instead of starting from zero. Real-time preview lets you see mask changes, helping you test transitions and effects without stopping playback.
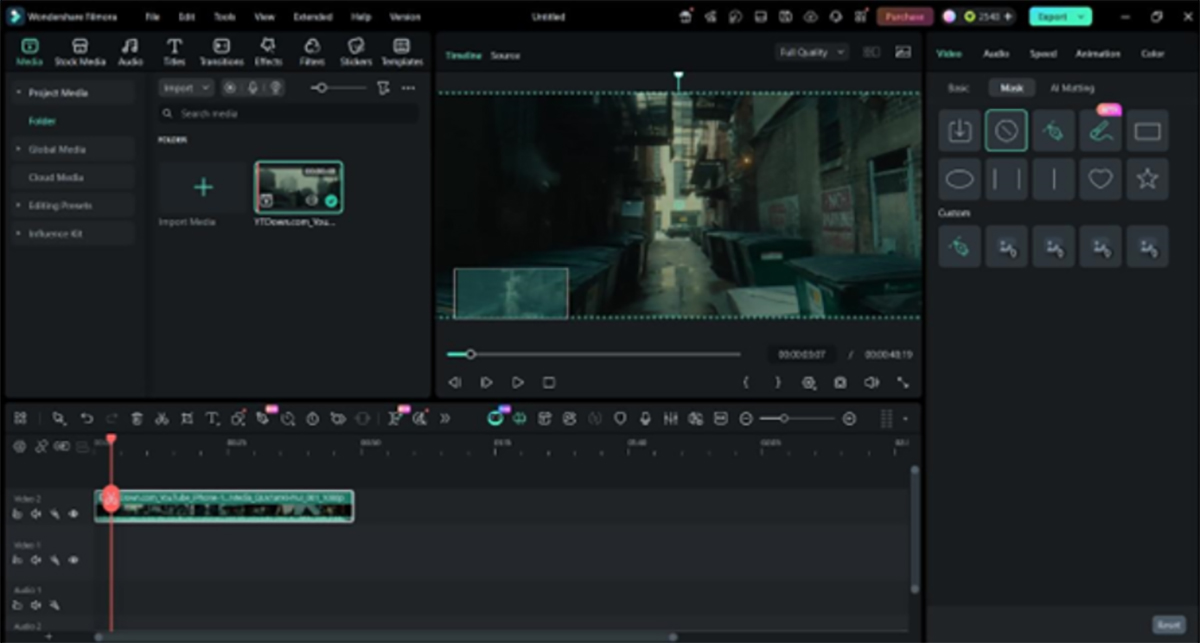
You can import your own shapes and graphics as reusable mask templates for branding or custom looks. The pen mask tool allows detailed sculpting, including curved paths, tight outlines, and unusual shapes around tricky subjects. Moreover, its transform controls enable shape rotation, anchor point tweaks, inversion, and keyframed animation for dynamic masks.
Pros
⦁ Reduces detailed manual work by using AI edge detection to build accurate masks.
⦁ PowerMesh and mesh warp need fewer keyframes while following detailed organic motion.
⦁ Mocha planar tracking keeps masks steady on bending surfaces and moving fabrics.
Cons
⦁ The Mocha Filmora plugin requires a separate setup before you can start tracking.
⦁ CapCut (iOS|Android|Desktop)
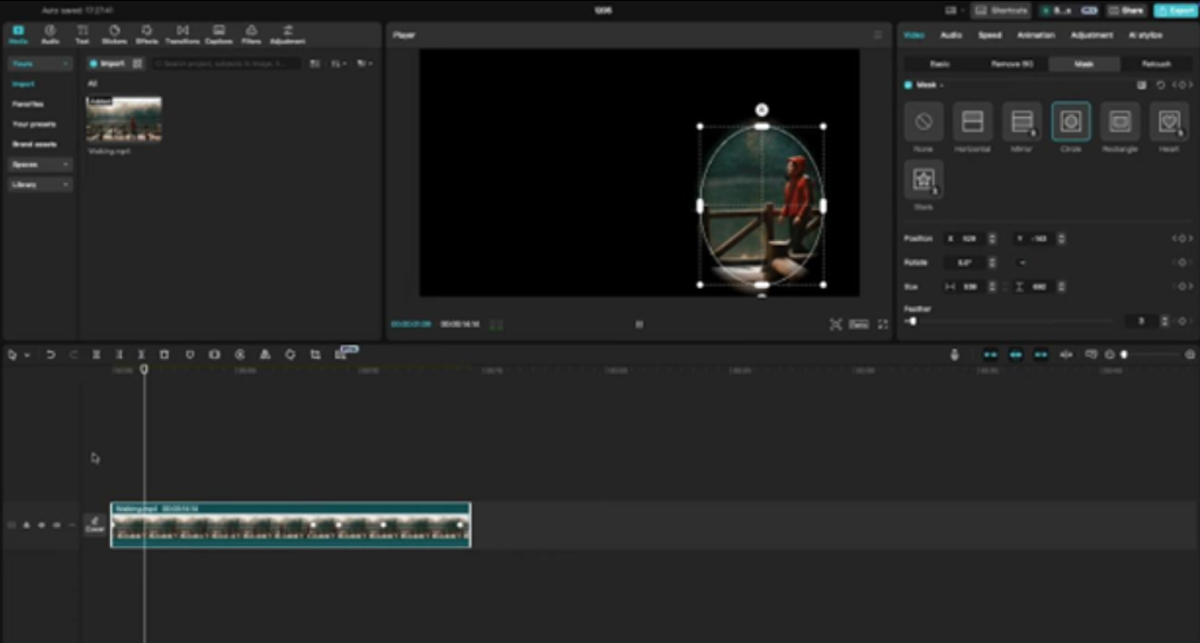
This is a simple editor that lets beginners and regular creators add clear masking effects. CapCut allows you to pick circles, rectangles, and custom shapes to hide and highlight important areas precisely. Feather controls help soften mask edges, so transitions between visible and hidden regions look smooth. With keyframes and motion tracking, you can mask video dynamically as subjects move across the frame.
Pros
⦁ Supports many mask shapes, including circles, rectangles, and custom designs for flexibility.
⦁ Keyframe support lets you animate mask position, size, and rotation over time.
Cons
⦁ Complex masking with many keyframes can feel confusing for complete beginner users.
⦁ Motion tracking struggles with fast movement and heavy motion blur.
⦁ Adobe Premiere Pro
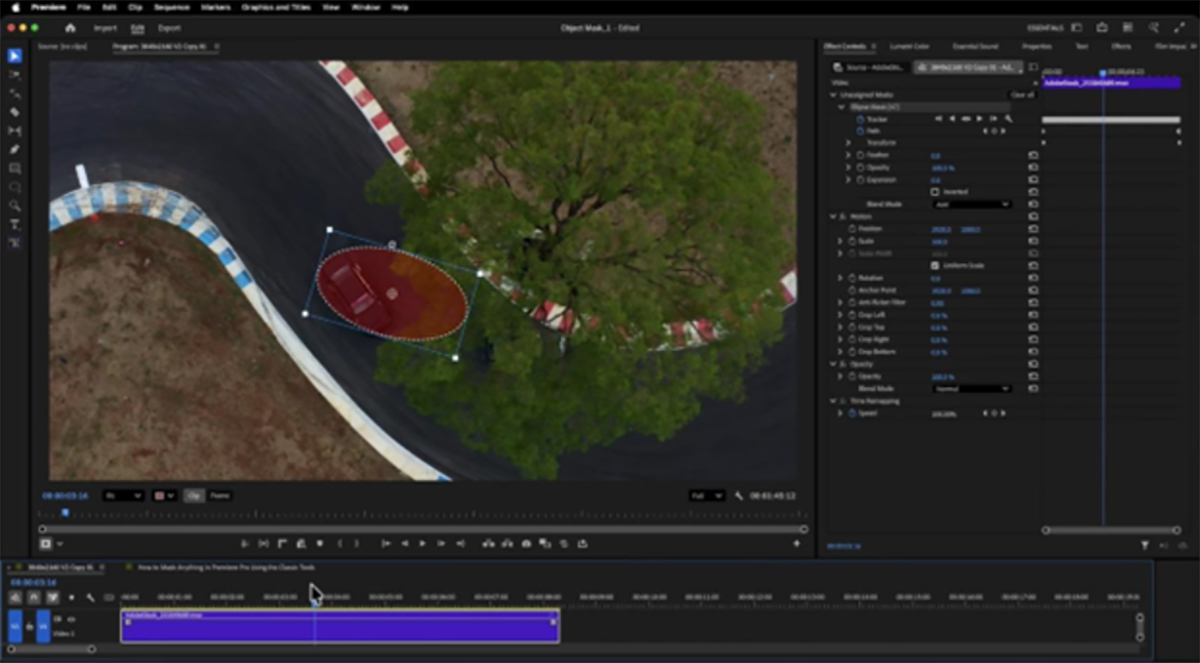
Being an advanced editor, Adobe Premiere Pro offers strong control and flexibility for detailed masking. You can use shape masks to quickly cover areas with simple shapes, such as squares, circles, or other presets. The Pen tool lets you draw custom paths around objects, creating very accurate cutouts or spot effects. Together with tracking and feather controls, these tools support powerful masking in video for professional results.
Pros
⦁ Pen Mask Tool supports detailed Bezier paths, perfect for tracing complex outlines.
⦁ New AI Object Mask speeds up isolating moving subjects without manual rotoscoping.
Cons
⦁ Object Mask currently depends on newer versions, limiting support on older installations.
⦁ Complex Pen masks with many points can become hard to manage.
⦁ DaVinci Resolve
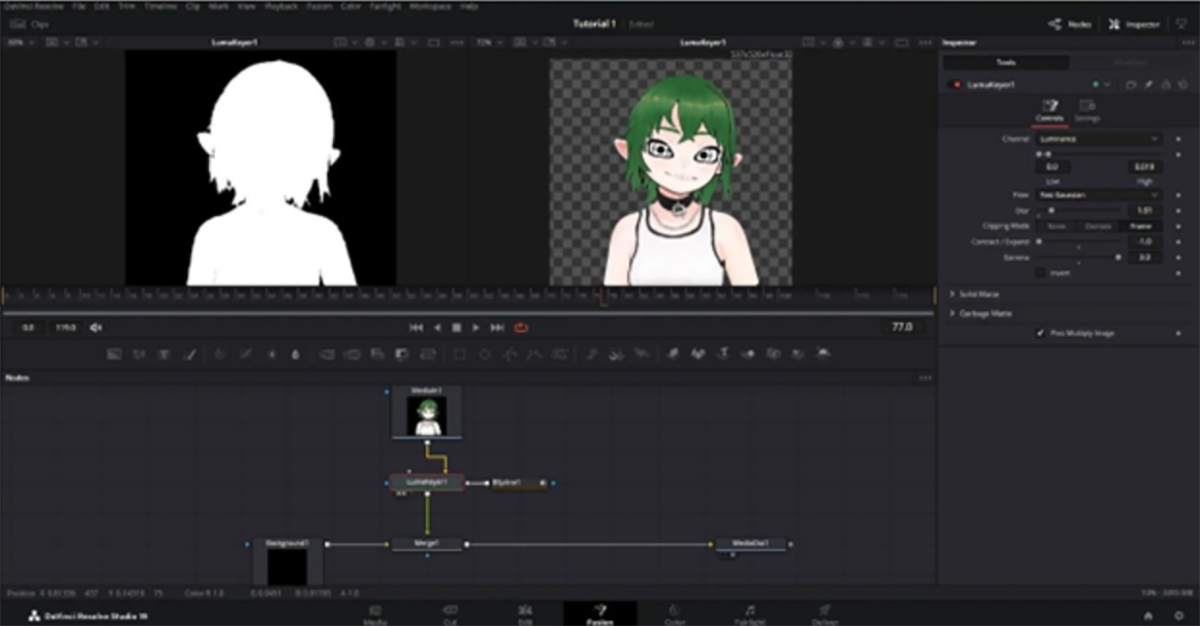
DaVinci Resolve is a cross‑platform editor that combines timeline cutting, color grading, and detailed masking tools. Its node-based system lets you adjust layers, reveal text behind moving objects, and create sharp focus transitions. The Magic Mask 2.0 in DaVinci Resolve 20 uses AI to isolate people or objects automatically. Together, these features make building an advanced video mask for color, effects, and motion graphics workflows easier.
Pros
⦁ Magic Mask 2.0 quickly isolates objects using AI-driven tracking and detection.
⦁ The Fusion page supports advanced 2D effects within masks, such as stylized outlines.
Cons
⦁ The node-based masking workflow feels confusing for beginners coming from simpler timeline editors.
⦁ Some advanced masking features are only available in the paid Studio version.
⦁ Movavi Video Editor
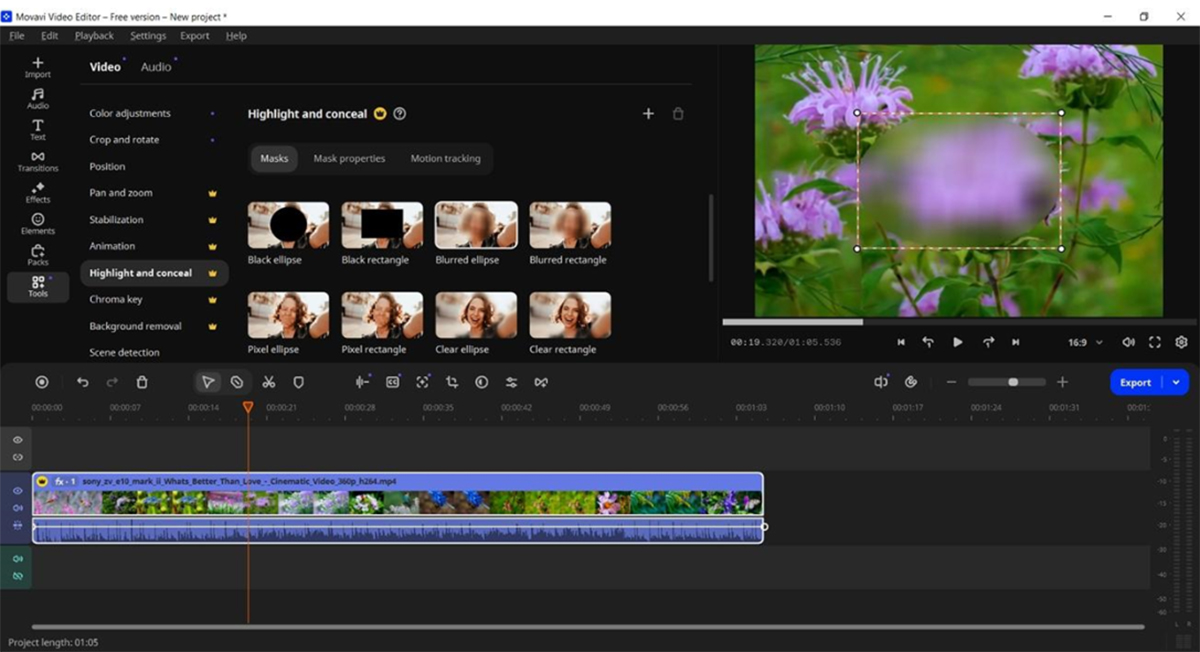
This PC tool helps you build focused looks by masking only important parts of each clip. It offers opacity controls, so you can partially hide areas and create smooth ghosted overlays. Feathering options let you soften mask edges, making blends between visible and hidden regions look natural. With AI motion tracking, you can mask video elements that move to keep effects locked on changing subjects.
Pros
⦁ Masking works directly on timeline clips, so refinements stay simple.
⦁ Preset shapes speed up masking of common areas, such as faces and screen regions.
Cons
⦁ Limited advanced controls for separate X/Y feathering restrict specialized blend adjustments.
⦁ Complex multi-point masks are harder to build than in high-end professional editors.
Comparing Top Video Masking Tools Together
Having discussed top masking in video tools, many users may feel unsure which option fits best. So, look at the table below to compare platforms and their masking strengths and features:
| Tool | Common Input Formats | AI Masking | Key Masking Strength | Masking Features |
| Wondershare Filmora | MP4, MOV, MTS, AVI, MKV | Yes | Hybrid AI + Mocha precision | Mocha planar and mesh tracking |
| CapCut | MP4, MOV, MKV, WEBM | Limited | Fast social-style masking | Feather and animated masks |
| Adobe Premiere Pro | MP4, MOV, MXF, ProRes, 3GP | Yes | Detailed Bezier and object tools | Object/Auto Mask, Lumetri masks |
| DaVinci Resolve | MP4, MOV, MXF, R3D, DPX | Yes | Deep color + mask integration | Magic Mask, node-based masking |
| Movavi Video Editor | MP4, MOV, AVI, MKV | Limited | Beginner-friendly masking tools | Opacity, feather, simple tracking |
Part 3. Why Filmora Is The Best Tool For Video Masking Effects
After trying multiple tools, Filmora stands out for combining AI masking with precise manual tools. Its Mocha integration adds advanced planar tracking, so your masks stay stable on complex surfaces and movements. Real-time preview lets you test blends and shape changes without stopping playback. Together, these features make building a detailed video mask feel comfortable for non‑experts.
Detailed Guide to Creating Professional Masks with Filmora
Once you know why Filmora is the best choice for masking effects, you might wonder how it works. Next, follow the steps below to start building professional masks in your own projects:
Step 1. Import Videos for Masking
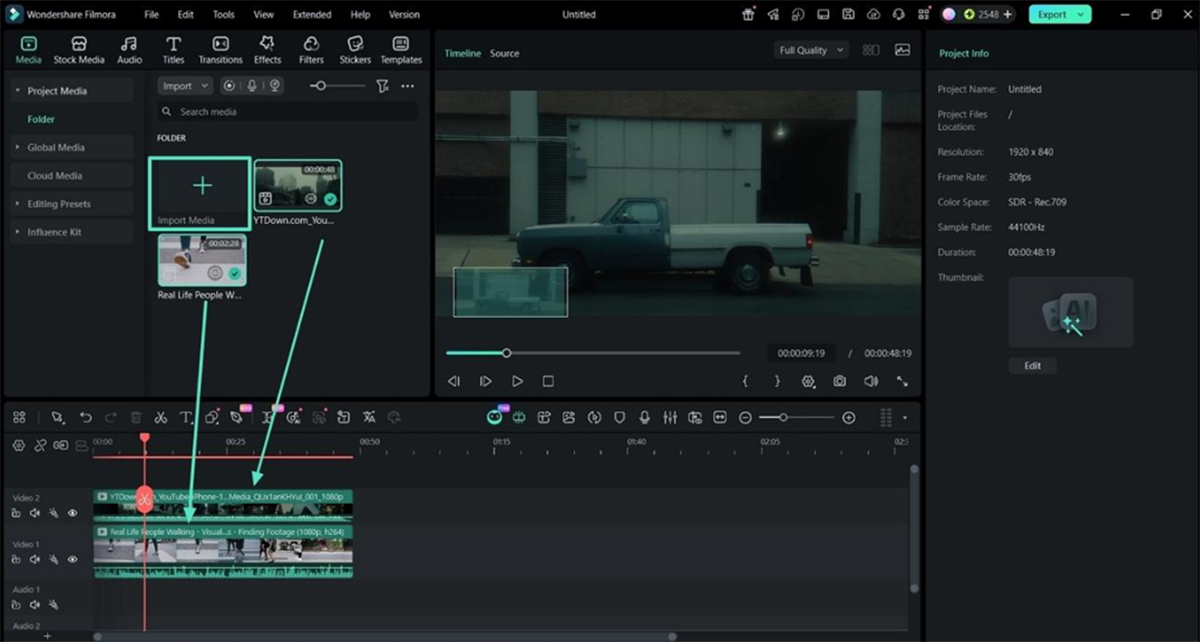
Once you create a New Project for your video, click the “Import Media” option, or drag and drop the media file directly. Next, drag the video files onto the timeline.
Step 2. Add Mask Effect to Video
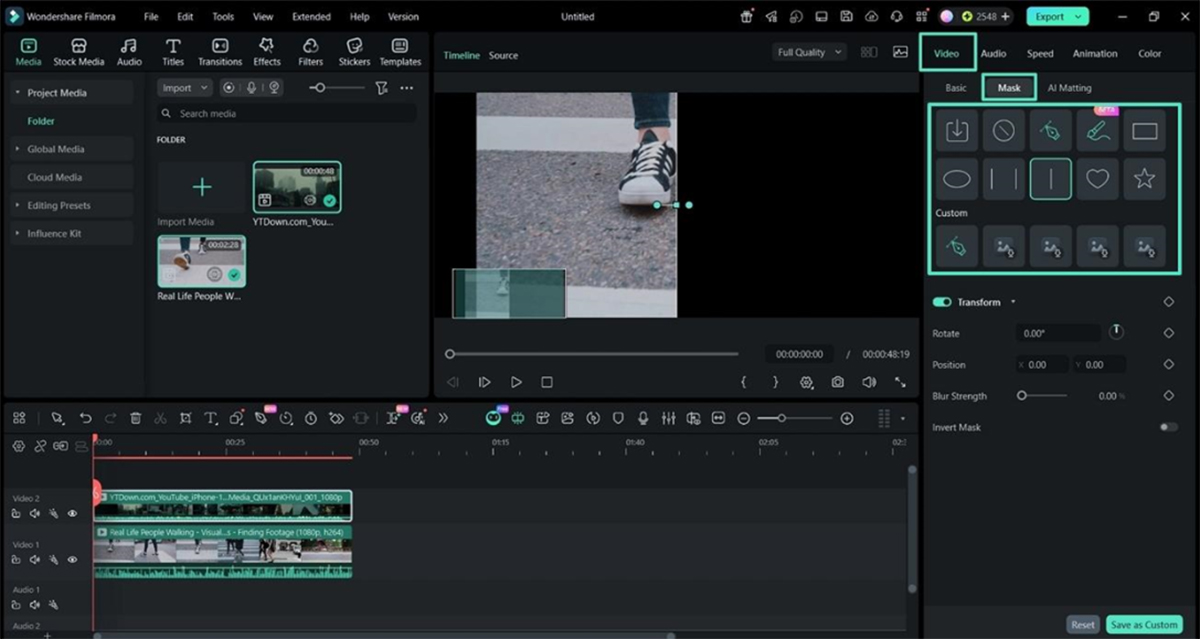
Afterward, click the “Video” tab in the top right corner and press the “Mask” tab. Next, pick a Masking preset and adjust the Rotation and Orientation.
Step 3. Animate the Mask
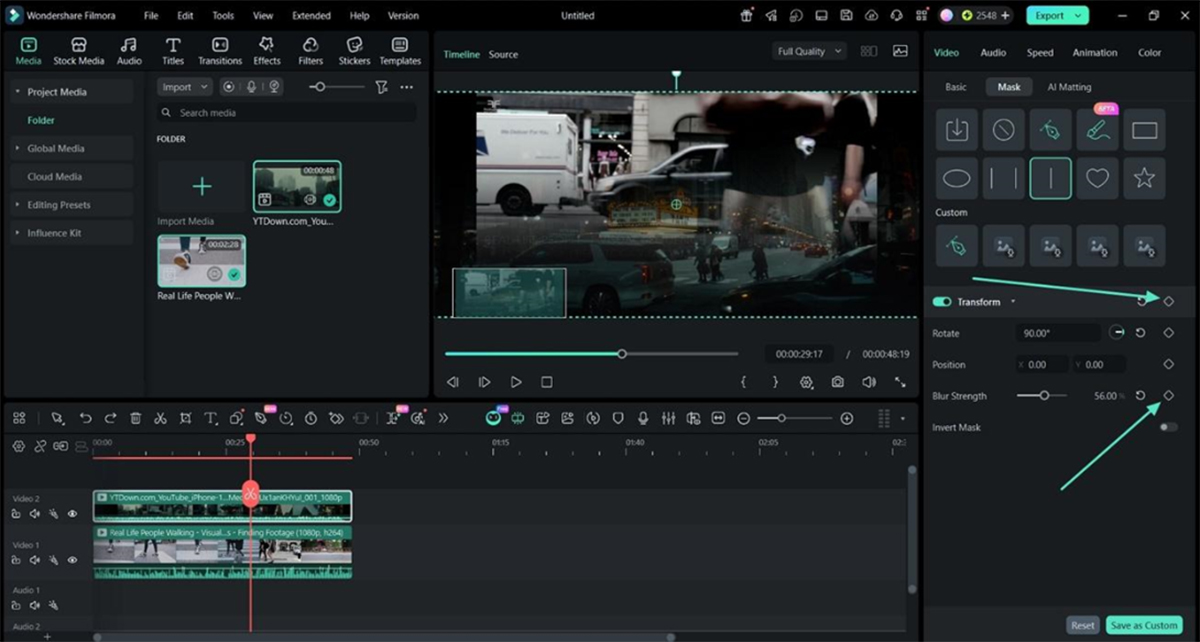
If you want to animate your mask properties, click the “Add Keyframe” icon next to any property. To add keyframes for all properties, press the “Add Keyframe” icon at the top.
Step 4. Adjust the Keyframe Properties
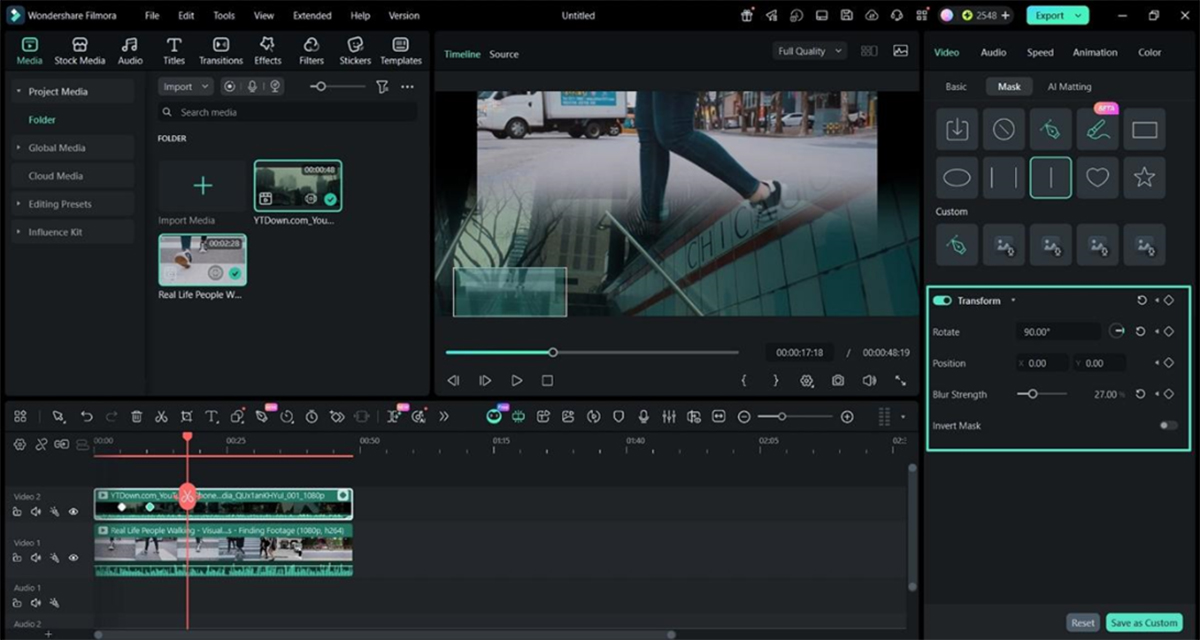
After adding a keyframe, adjust the angle and blur strength to get an amazing transition.
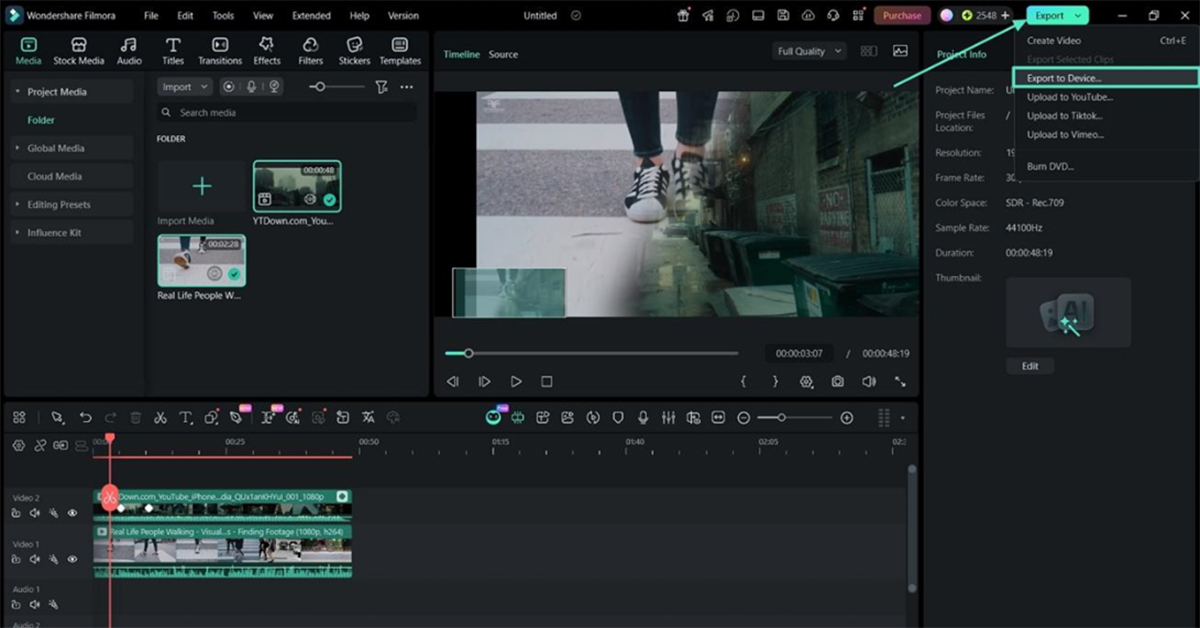
Step 5. Preview and Export Final Video
Once done, play the final video and review it. After the video is finalized, expand the “Export” option and click the “Export to Device” option to save the final video.
Conclusion
In conclusion, we explored how modern masking tools make creative editing easier for video creators. These tools let you highlight subjects and hide distractions without learning complex workflows. Whether you edit on desktop or mobile, these editors offer different strengths for creative control. If you want a simple way to mask video with advanced options, consider using Wondershare Filmora.
Looking to produce commercial video ads from scratch using AI? Try Filmora.TV, a dedicated AI production platform distinct from the standard Filmora editing software. Designed for teams and agencies, Filmora.TV brings your ideas to life through AI script generation, infinite canvas storyboarding, advanced camera angle control, and multi-track video creation.